
Table of Contents
- Introduction: Why Network Migration Feels So Terrifying
- Understanding Zigbee and Z-Wave Network Architecture Before Migration
- Pre-Migration Checklist: What You Must Do Before Touching Anything
- How to Back Up Your Entire Smart Home Configuration
- Step-by-Step: Migrating Your Zigbee Network Without Losing Devices
- Step-by-Step: Migrating Your Z-Wave Network Without Re-Pairing
- How to Preserve Automations During Migration
- Real-World Migration Scenarios and How They Were Solved
- Common Migration Mistakes and How to Avoid Them
- Post-Migration Testing and Validation
- FAQ: Zigbee and Z-Wave Migration
- Final Thoughts
Introduction: Why Network Migration Feels So Terrifying
Let me be honest with you. I have been there. Staring at a smart home hub with over 60 devices connected, dozens of automations running perfectly, and suddenly realizing I needed to migrate everything to a new controller. The fear was real. What if my lights stop responding at 2 AM? What if my door locks go offline? What if every single automation I spent months building just vanishes?
If you are reading this, you probably feel the same way right now. Maybe you are upgrading from a SmartThings hub to Home Assistant. Maybe your old Z-Wave stick died and you need a new one. Or perhaps you just want to move from one Zigbee coordinator to a more powerful one like the SONOFF Zigbee 3.0 Dongle Plus.
The good news? You can migrate Zigbee and Z-Wave networks without breaking automations. It requires planning, patience, and the right approach. This guide walks you through every single step based on real experience, not theory.
Understanding Zigbee and Z-Wave Network Architecture Before Migration
Before you unplug anything, you need to understand how these two protocols actually store network information. This knowledge alone will save you from the most common migration disasters.
How Zigbee Networks Store Device Information
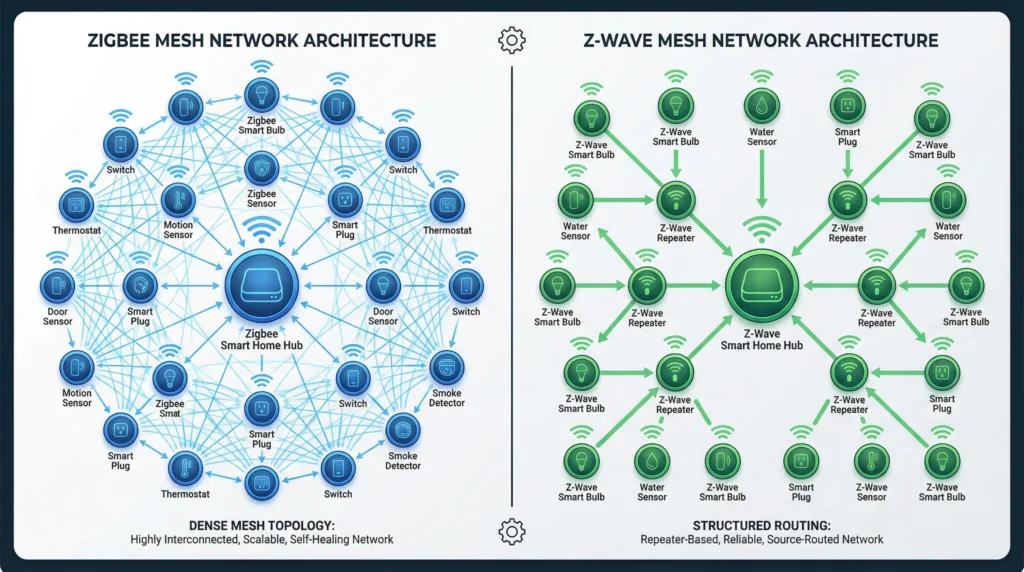
Zigbee operates on a mesh network topology. Every device knows its network key, its PAN ID (Personal Area Network ID), and its coordinator address. When you pair a Zigbee device, the coordinator assigns it a short network address and shares the encryption key.
Here is what matters for migration: Zigbee devices are fundamentally tied to the coordinator that paired them. If you swap the coordinator without transferring the network data, every single device thinks it has been abandoned. They will not respond until you re-pair them.
However, some coordinators like those based on Texas Instruments CC2652 chips allow you to back up and restore the network configuration, including the network key and device tables. This is the key to a smooth migration.
This is because Zigbee devices establish paths based on link quality at the moment of pairing. If you want to dive deeper into how these mesh pathways are formed and why they sometimes fail in crowded environments, read our comprehensive guide on Why Do Zigbee Devices Choose Poor Routing Paths in Dense Homes? Causes, Fixes, and Real Solutions.
How Z-Wave Networks Store Device Information
Z-Wave is different. Each Z-Wave controller has a unique Home ID, and every device paired to it receives a Node ID. The critical difference is that Z-Wave controllers can transfer their Home ID to a new controller through a process called controller shift or NVM (Non-Volatile Memory) backup and restore.
This means Z-Wave migrations can be nearly seamless if your old and new controllers support NVM backup. The new controller literally becomes the old one from the perspective of your devices.
Pre-Migration Checklist: What You Must Do Before Touching Anything
I cannot stress this enough. The difference between a smooth migration and a weekend-long nightmare comes down to preparation. Here is exactly what you need to do before starting.
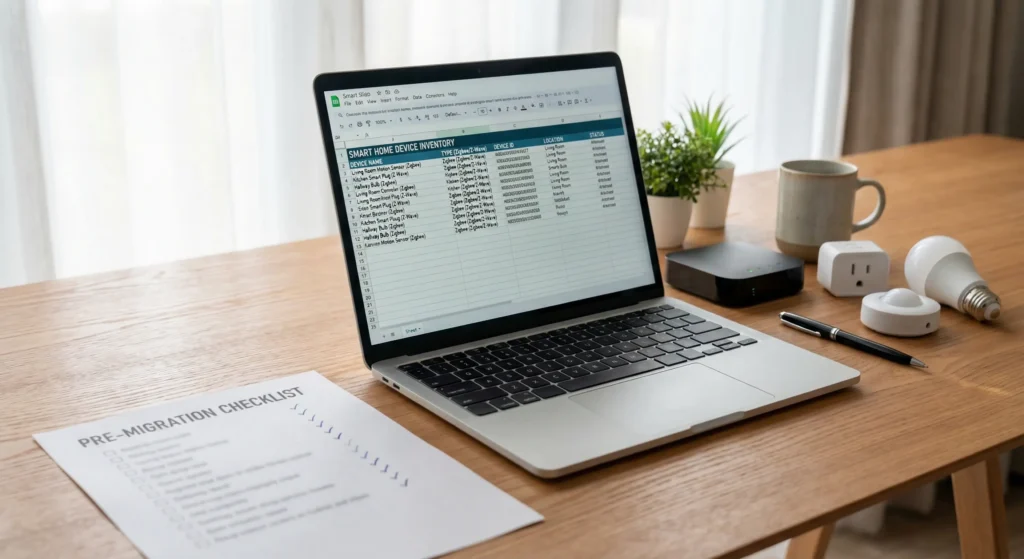
1. Document Every Single Device
Open a spreadsheet and list:
- Device name and location
- Protocol (Zigbee or Z-Wave)
- Device manufacturer and model
- Current firmware version
- Which automations use this device
- Node ID (for Z-Wave) or IEEE address (for Zigbee)
This sounds tedious. It is. But when something goes wrong during migration and you need to identify which device is not responding, this list becomes your lifeline.
2. Export All Automations
Whether you are using Home Assistant, Hubitat, SmartThings, or any other platform, export your automation configurations:
- Home Assistant: Copy your
automations.yaml,scripts.yaml,scenes.yaml, andconfiguration.yamlfiles - Hubitat: Use the built-in backup feature under Settings > Backup and Restore
- SmartThings: Unfortunately, SmartThings does not offer easy automation export, so screenshot every automation manually
3. Check Compatibility of Your New Hardware
Not all controllers support NVM backup restore. Not all Zigbee coordinators can import network keys from other coordinators. Verify compatibility before purchasing.
Z-Wave controllers that support NVM backup:
- Zooz 800 Series (ZST39)
- Silicon Labs UZB-7
- Aeotec Z-Stick 7
Zigbee coordinators that support network backup:
- SONOFF Zigbee 3.0 USB Dongle Plus (CC2652P)
- Conbee II / Conbee III (via deCONZ)
- ELR EFR32 based coordinators (with Zigbee2MQTT)
4. Update All Firmware First
Update your current coordinator firmware and device firmware before migrating. You do not want to troubleshoot firmware issues during migration. Do it now while everything is stable.
5. Choose Your Migration Window
Pick a time when your household can function without smart home automations for a few hours. Weekend mornings work best. Avoid migrating before a vacation or when you have guests.
How to Back Up Your Entire Smart Home Configuration
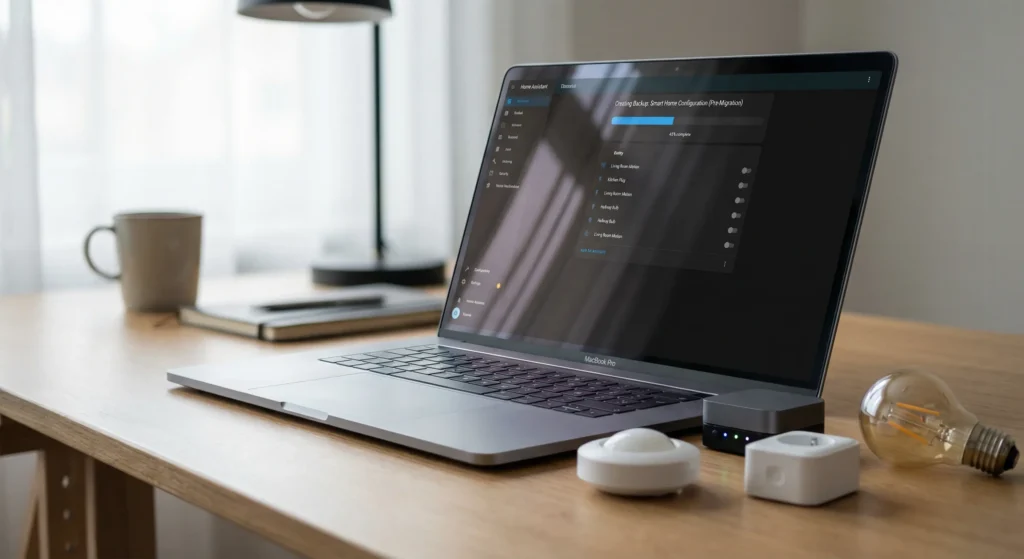
Backing Up Home Assistant
If you are using Home Assistant, this is the most critical step:
Full Snapshot Backup:
- Navigate to Settings > System > Backups
- Click Create Backup
- Select Full Backup (this includes all add-ons, configurations, and databases)
- Download the backup file to an external location (Google Drive, USB drive, or another computer)
- Verify the backup file is not corrupted by checking its size
Manual File Backup:
text/config/automations.yaml
/config/scripts.yaml
/config/scenes.yaml
/config/configuration.yaml
/config/.storage/core.device_registry
/config/.storage/core.entity_registry
/config/.storage/core.area_registry
Copy these files to a safe location. The .storage files contain your device and entity registries, which map device IDs to friendly names and areas.
Backing Up Zigbee Network Data
If using Zigbee2MQTT:
- Stop Zigbee2MQTT
- Copy the entire
/opt/zigbee2mqtt/data/directory - The critical files are
coordinator_backup.json,database.db, andconfiguration.yaml - Zigbee2MQTT automatically creates coordinator backups, but you can force one through the web interface
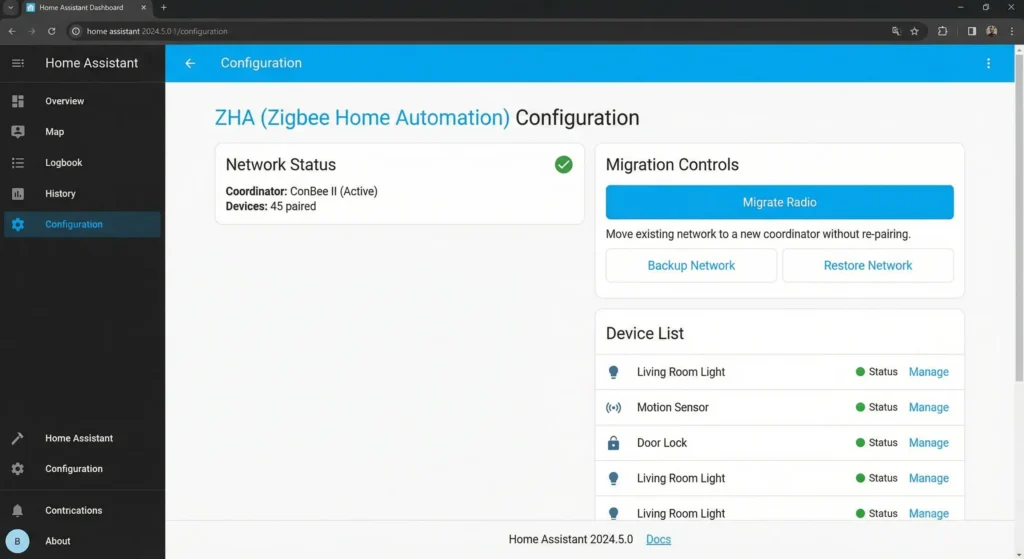
If using ZHA (Zigbee Home Automation in Home Assistant):
- Go to Settings > Devices & Services > ZHA
- Click Configure
- Select Migrate Radio
- Choose Create a backup before proceeding
- Save the backup file
Backing Up Z-Wave Network Data
If using Z-Wave JS UI (formerly ZWave2MQTT):
- Open the Z-Wave JS UI web interface
- Navigate to Settings > Backup
- Click Create Backup to download the NVM backup
- Store this file safely
If using Z-Wave JS in Home Assistant:
- Go to Settings > Devices & Services > Z-Wave JS
- Click Configure
- Select Create a backup of your Z-Wave network
- Download and save the NVM file
Step-by-Step: Migrating Your Zigbee Network Without Losing Devices
This is where the real work begins. Follow these steps exactly in order.
Method 1: Zigbee2MQTT Coordinator Migration (Recommended)
This method works when you are keeping Zigbee2MQTT but changing the physical coordinator hardware.
Step 1: Ensure Zigbee2MQTT is updated to the latest version
Coordinator migration support improved significantly in Zigbee2MQTT 1.30+. Update first.
Step 2: Stop Zigbee2MQTT completely
Bashsudo systemctl stop zigbee2mqtt
Step 3: Flash the new coordinator with the correct firmware
For a CC2652P based dongle, use the Koenkk Z-Stack firmware:
- Download the appropriate firmware for your chip
- Flash using cc2538-bsl or TI Flash Programmer 2
Step 4: Plug in the new coordinator and identify its serial port
Bashls -la /dev/serial/by-id/
Note the new device path.
Step 5: Update Zigbee2MQTT configuration
Edit /opt/zigbee2mqtt/data/configuration.yaml:
YAMLserial:
  port: /dev/serial/by-id/your-new-coordinator-id
Step 6: Start Zigbee2MQTT
Bashsudo systemctl start zigbee2mqtt
Zigbee2MQTT will detect the new coordinator and automatically restore the network backup (coordinator_backup.json) onto it. This transfers the network key, PAN ID, and extended PAN ID to the new stick.
Step 7: Wait for devices to rejoin
Most battery-powered devices will take 1 to 24 hours to check in with the new coordinator. Mains-powered devices (like smart plugs and bulbs) usually reconnect within minutes because they are also routers in the mesh.
Pro tip: Power-cycle your mains-powered Zigbee devices first. They form the mesh backbone. Once they reconnect, battery devices will find their way back much faster.
Method 2: ZHA Migration in Home Assistant
Home Assistant added a native radio migration feature in version 2023.2+.
Step 1: Go to Settings > Devices & Services > ZHA > Configure
Step 2: Click Migrate Radio
Step 3: The system will create a backup of your current network
Step 4: Physically swap the coordinator hardware
Step 5: Select the new coordinator when prompted
Step 6: ZHA will restore the network configuration to the new coordinator
Step 7: All devices should appear as they were, with entity IDs preserved
This method preserves all automations because entity IDs do not change. The devices keep the same identifiers in Home Assistant.
Step-by-Step: Migrating Your Z-Wave Network Without Re-Pairing
Z-Wave migration is actually more straightforward than Zigbee if your controllers support NVM backup. Here is the exact process.
Using Z-Wave JS UI for Migration
Step 1: Create NVM Backup from Old Controller
- Open Z-Wave JS UI
- Go to Settings > Actions
- Click Backup to download the NVM (Non-Volatile Memory) file
- Save this file. It contains your Home ID, all Node IDs, security keys, and network routing information
Step 2: Stop the Z-Wave JS Service
Bashsudo systemctl stop zwave-js
Step 3: Physically Swap the Controller
Unplug the old Z-Wave stick and plug in the new one. Identify its serial port:
Bashls -la /dev/serial/by-id/
Step 4: Update Configuration
Update the serial port in your Z-Wave JS UI configuration to point to the new stick.
Step 5: Start the Service and Restore NVM
- Start Z-Wave JS
- Open the web interface
- Go to Settings > Actions
- Click Restore and select your NVM backup file
- The new controller will adopt the Home ID and all node information from the old one
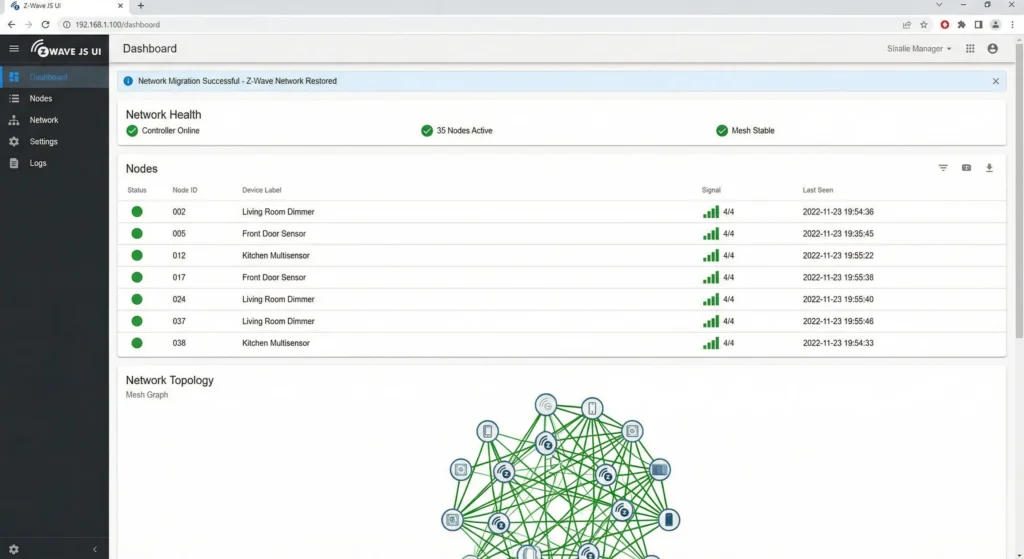
Step 6: Verify All Nodes
After restoration, check that all nodes appear in the device list. Some nodes may show as “dead” initially. This is normal. They need to communicate with the new controller to update their routing tables.
Step 7: Heal the Network
Trigger a network-wide heal:
- Go to Actions > Heal Network
- Let it run. This can take several hours for large networks
- Do not interact with devices during the heal process
After healing, every device should update its routing table to work with the new controller optimally.
Important Note About Z-Wave Chip Generations
NVM backup and restore works best when migrating between the same Z-Wave chip generation:
- 500 series to 500 series: Fully compatible NVM restore
- 700 series to 700 series: Fully compatible NVM restore
- 500 series to 700/800 series: Supported in Z-Wave JS 10+ with automatic NVM conversion
- 700 series to 800 series: Supported with NVM conversion
The Z-Wave JS driver handles the conversion automatically in most cases, but you should always verify after restore.
How to Preserve Automations During Migration
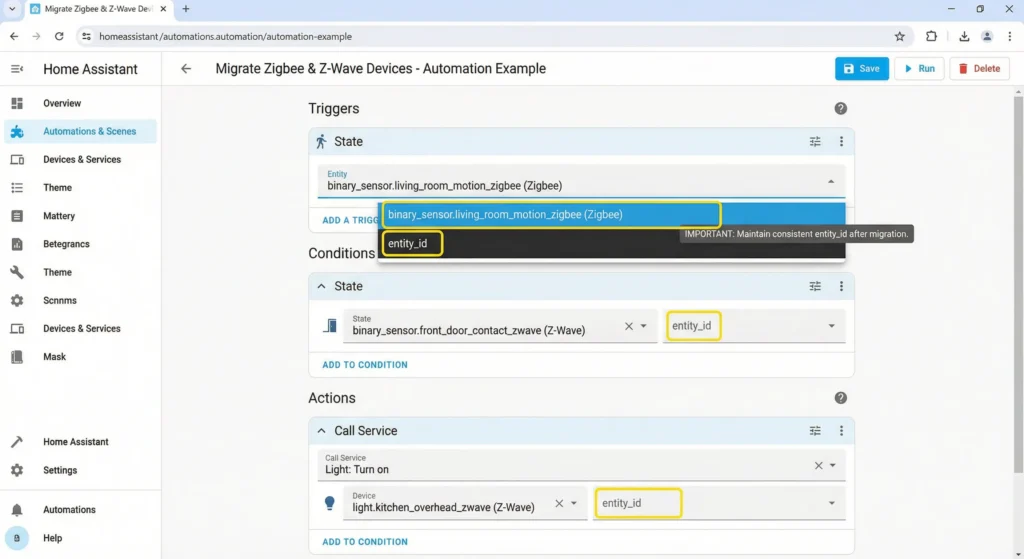
This is the section most guides skip, and it is the one that matters most to you. Your automations survive migration only if entity IDs remain the same. Here is how to ensure that.
Why Automations Break During Migration
Automations in Home Assistant (and similar platforms) reference devices by their entity IDs, such as light.living_room_lamp or switch.garage_door. These entity IDs are linked to the device’s unique identifier:
- Zigbee: IEEE address (the 64-bit hardware address like
0x00158d0006xxxxxx) - Z-Wave: Home ID + Node ID combination
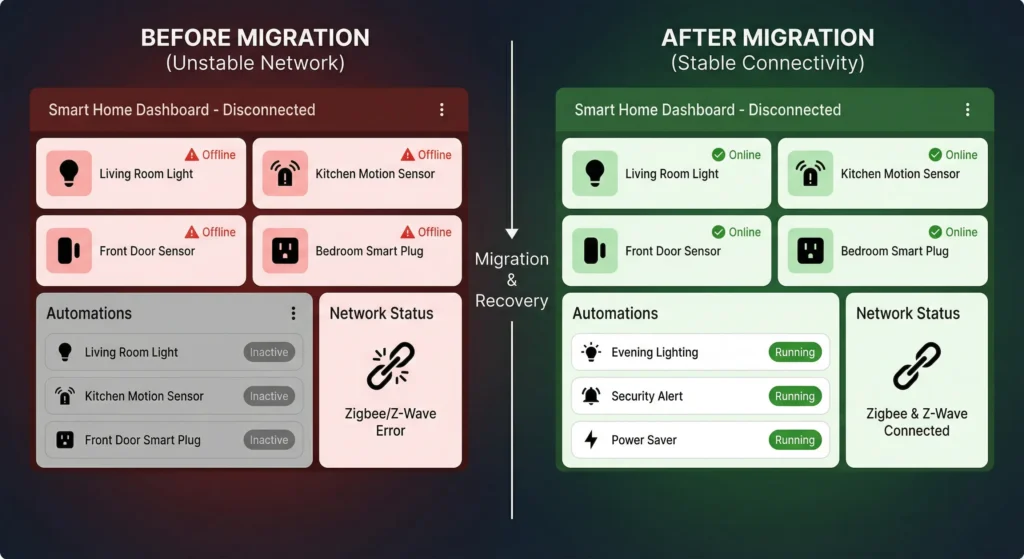
When you migrate correctly (using backup and restore), the platform recognizes the same devices and assigns them the same entity IDs. Your automations continue working as if nothing happened.
When you re-pair devices instead of migrating, the platform sees them as new devices and assigns new entity IDs. Every automation referencing the old entity ID breaks.
Strategy 1: Backup and Restore (Best Approach)
This is what we covered above. Use NVM backup for Z-Wave and coordinator backup for Zigbee. Entity IDs are preserved automatically.
Strategy 2: Manual Entity ID Reassignment (Fallback)
If you must re-pair devices, you can still save your automations:
- Before migration, note down every entity ID and its corresponding device
- After re-pairing, the device gets a new entity ID (like
light.living_room_lamp_2) - Go to Settings > Devices & Services > Entities
- Find the new entity
- Click on it and select Edit Entity ID
- Change it back to the original entity ID
- Restart Home Assistant
This works, but it is tedious for large networks. Use it only as a last resort.
Strategy 3: Using Device-Based Automations
If you are setting up a new system or planning ahead, use device triggers instead of entity ID triggers in your automations. Device-based automations are more resilient because they reference the device registry entry, which can be updated without changing the automation.
However, even device-based automations can break if the device is completely removed and re-added. Backup and restore is still the safest path.
Real-World Migration Scenarios and How They Were Solved
Scenario 1: Moving from SmartThings to Home Assistant
The situation: Sarah had 45 Z-Wave devices and 20 Zigbee devices on a Samsung SmartThings hub. SmartThings was moving more features to the cloud, and she wanted local control.
The challenge: SmartThings does not support Z-Wave NVM export. You cannot extract the Z-Wave network data from the SmartThings hub.
The solution:
- She set up Home Assistant on a Raspberry Pi 4 with a Zooz ZST39 (800 series Z-Wave) and SONOFF Zigbee 3.0 dongle
- She used the SmartThings Z-Wave exclude function to properly remove each Z-Wave device, then immediately included it on the new Z-Wave stick through Z-Wave JS
- For Zigbee devices, she reset each one and paired it with Zigbee2MQTT
- She migrated automations manually but used the same entity naming convention
- Total migration time: 2 weekends (she did Z-Wave one weekend, Zigbee the next)
The lesson: When moving between incompatible platforms, there is no shortcut. You must re-pair. But doing it in phases makes it manageable.
Scenario 2: Upgrading from CC2531 to CC2652P Zigbee Coordinator
The situation: Mark had 70+ Zigbee devices on a CC2531 coordinator running Zigbee2MQTT. Performance was degrading because the CC2531 cannot handle large networks well.
The challenge: He could not afford downtime. His wife would not accept broken light automations.
The solution:
- He updated Zigbee2MQTT to the latest version
- He verified that
coordinator_backup.jsonexisted in the data directory - He stopped Zigbee2MQTT at 11 PM when most automations were not critical
- He flashed the CC2652P with the latest Z-Stack coordinator firmware
- He updated the serial port in the configuration
- He started Zigbee2MQTT
- Within 15 minutes, all mains-powered devices reconnected
- By morning, every battery sensor was reporting again
- Zero automations broke. Total downtime: 20 minutes
The lesson: Zigbee2MQTT coordinator migration is remarkably smooth when you follow the backup and restore process.
Scenario 3: Z-Wave Stick Hardware Failure
The situation: David’s Aeotec Z-Stick Gen5 (500 series) died suddenly. He had 30 Z-Wave devices and no backup.
The challenge: Without an NVM backup, all device pairing information was lost with the dead stick.
The solution:
- He purchased a Zooz ZST39 (800 series)
- He had to use the replace failed controller approach
- For each device, he factory reset it and re-included it
- He used Home Assistant entity ID editing to match old entity IDs where possible
- Some automations needed manual fixing
- Total recovery time: 1 full day
The lesson: Always maintain regular NVM backups. Set a monthly reminder. David now has automated Z-Wave JS backups running weekly.
Common Migration Mistakes and How to Avoid Them
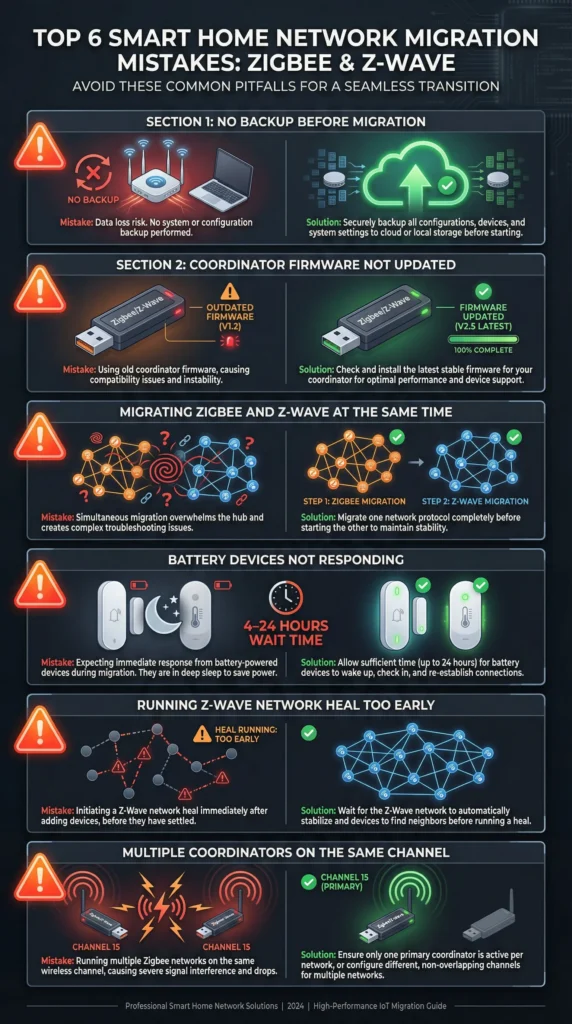
Mistake 1: Not Backing Up Before Starting
I know I have said this multiple times. I am saying it again because this is the number one cause of migration disasters in every smart home forum. Back up everything. Then back up the backups.
Mistake 2: Forgetting to Update the Coordinator Firmware
Older firmware versions may not support backup and restore features. Flashing the latest firmware on your new coordinator before migration is essential. But never flash new firmware on your old coordinator right before migration. If the flash fails, you lose everything.
Mistake 3: Migrating Zigbee and Z-Wave Simultaneously
Migrate one protocol at a time. If something goes wrong, you want to isolate the problem. Do Z-Wave first (it is generally smoother), verify everything works, then do Zigbee. Or vice versa based on your comfort level.
Mistake 4: Not Waiting for Battery Devices
After migrating a Zigbee coordinator, many users panic when their door sensors and temperature sensors do not respond immediately. Battery-powered Zigbee devices only check in periodically (some as rarely as every 4 to 6 hours). Wait 24 hours before declaring a device lost.
Mistake 5: Healing Z-Wave Network Too Early
After restoring an NVM backup to a new Z-Wave controller, wait at least 30 minutes before starting a network heal. Let devices discover the new controller naturally first. Then heal to optimize routes.
Mistake 6: Running Multiple Coordinators on the Same Channel
If you are testing a new Zigbee coordinator while the old one is still active, make sure they are not both broadcasting. Having two coordinators with the same network key on the same channel causes device confusion. Always power off the old coordinator before activating the new one.
Post-Migration Testing and Validation
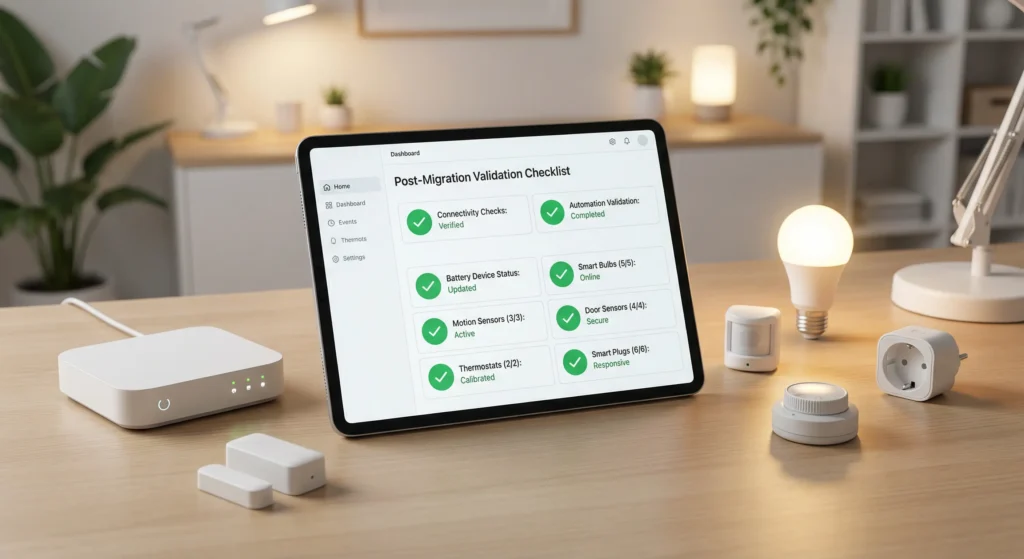
Migration is not done until you verify everything works. Here is a systematic testing approach.
Phase 1: Device Connectivity Check (First 30 Minutes)
- Open your smart home dashboard
- Check that all mains-powered devices show as online or available
- Test one device from each room by toggling it manually from the dashboard
- Check Z-Wave node status in Z-Wave JS UI for any “dead” nodes
Phase 2: Automation Testing (First 2 Hours)
- Manually trigger each automation one by one
- Check the automation trace/log to verify the correct entities are being triggered
- Pay special attention to automations that use:
- Device triggers (motion sensors, door sensors)
- Conditional logic based on device states
- Scripts that call multiple devices in sequence
Phase 3: Battery Device Verification (24 to 48 Hours)
- Monitor battery device check-ins through your Zigbee/Z-Wave logs
- Mark each battery device as “verified” in your spreadsheet as it reports in
- For any device that has not reported in 48 hours:
- Try pressing the pairing button briefly (not a factory reset) to wake it up
- Move it closer to a router device temporarily
- As a last resort, re-pair it
Phase 4: Edge Case Testing (First Week)
- Test time-based automations (sunrise/sunset triggers, scheduled routines)
- Test conditional automations (if temperature drops below X, then turn on heater)
- Test multi-device scenes (movie night scene, good morning routine)
- Monitor system logs for any recurring errors related to device communication
Frequently Asked Questions (FAQ)
Can I migrate Zigbee devices from one hub brand to another without re-pairing?
No. Zigbee network backup and restore only works within the same ecosystem. For example, you can migrate between two Zigbee2MQTT coordinators, or use ZHA’s migrate radio feature within Home Assistant. But you cannot transfer Zigbee devices from SmartThings to Home Assistant without re-pairing them.
Will my Z-Wave device names and locations transfer during migration?
The Z-Wave NVM backup contains node IDs and security keys, but device names and room assignments are stored in your smart home platform (Home Assistant, Hubitat, etc.), not in the Z-Wave controller. As long as your platform configuration is intact, names and locations will remain after migration.
How long does a complete Zigbee network migration take?
For a network with 50 to 100 devices, expect the actual migration process to take 15 to 30 minutes. However, full recovery where every battery device has checked in can take 24 to 48 hours. Plan accordingly.
Can I use my old Z-Wave controller as a secondary controller after migration?
After restoring the NVM backup to a new controller, your old controller should not be used on the same network. It still has the old Home ID, and having two controllers with the same Home ID causes conflicts. Either factory reset the old controller or store it as an emergency backup.
Do I need to be physically close to each device during Z-Wave NVM migration?
No. The beauty of NVM backup and restore is that the new controller assumes the identity of the old one. Devices do not need to be re-paired, so physical proximity is not required. However, you should run a network heal after migration to optimize RF routing through the new controller.
What happens if my migration fails halfway through?
This is why backups are essential. If Zigbee migration fails, you can plug the old coordinator back in and restore the backup. For Z-Wave, you can restore the NVM backup to the old stick (if it still works). Always keep the old hardware available for at least two weeks after migration.
Can I migrate from Z-Wave 500 series to 800 series?
Yes. Z-Wave JS supports NVM conversion between different chip generations. The driver automatically converts the NVM format during restore. However, 800 series features like Long Range (Z-Wave LR) will only work with devices that support it. Your existing 500-series devices will continue to work in classic Z-Wave mode.
Is there any risk of losing Z-Wave S2 security keys during migration?
When using NVM backup and restore through Z-Wave JS, S2 security keys are included in the backup. They transfer to the new controller along with all other network data. No security downgrade occurs during a proper migration.
Final Thoughts: Migration Is a Skill, Not a Gamble
Migrating Zigbee and Z-Wave networks does not have to be a stressful experience. The smart home community has built incredible tools that make this process smoother than ever. Z-Wave JS NVM backup and restore is nearly bulletproof. Zigbee2MQTT coordinator migration has become a 20-minute task for experienced users.
The secret is preparation. Document everything. Back up everything. Migrate one protocol at a time. And give battery devices time to reconnect before panicking.
If you are still nervous, start with a small test. Migrate just your Z-Wave network first while keeping Zigbee untouched. See how it goes. Build confidence. Then tackle Zigbee.
Your automations are not as fragile as they feel. With the right approach, they will survive the migration just fine.
Useful External Resources
- Zigbee2MQTT Migration Guide (Official Documentation)
- Z-Wave JS Controller Migration Guide
- Home Assistant ZHA Migration Documentation
- Z-Wave Alliance Official Resources
- Zigbee2MQTT Supported Adapters List