
Table of Contents
- Introduction: When Your Smart Home Stops Being Smart
- What Is a Z-Wave Mesh Network and Why Does It Get Corrupted?
- Signs Your Z-Wave Mesh Is Corrupted
- Before You Start: Important Precautions
- Step-by-Step Guide to Rebuild Your Z-Wave Mesh Without Re-Pairing
- How to Heal Your Z-Wave Network on Different Platforms
- Advanced Troubleshooting: When Basic Healing Doesn’t Work
- Real-World Scenarios and How They Were Fixed
- How to Prevent Z-Wave Mesh Corruption in the Future
- FAQ
- Final Thoughts
Introduction: When Your Smart Home Stops Being Smart
You walk into your living room and tap the switch on your phone to turn on the lights. Nothing happens. You try once more. Still no response. Then, out of nowhere, the kitchen light flickers on instead. Your smart lock takes a full 15 seconds before it reacts. Your thermostat simply reads “unavailable.”
If this sounds all too familiar, you are not alone. Anyone who has been running a Z-Wave smart home long enough has almost certainly run into this maddening scenario at some point. And in nearly every case, the root cause comes down to one thing: a corrupted Z-Wave mesh network.
The natural reaction for most people is to rip everything out and start from scratch, removing every device and re-pairing them individually. But after years of hands-on experience with smart home systems, I can tell you that this drastic step is rarely needed. The truth is, you can rebuild corrupted Z-Wave mesh without re-pairing a single device, and in this guide, I am going to walk you through the exact process to do it.
I have personally tackled this problem across a wide range of setups, from compact apartments with just 10 devices to sprawling homes running over 80 Z-Wave nodes. In every single case, the mesh was fully restored without having to re-pair anything. This guide brings together every lesson I have learned along the way.
What Is a Z-Wave Mesh Network and Why Does It Get Corrupted?
Understanding the Mesh Concept
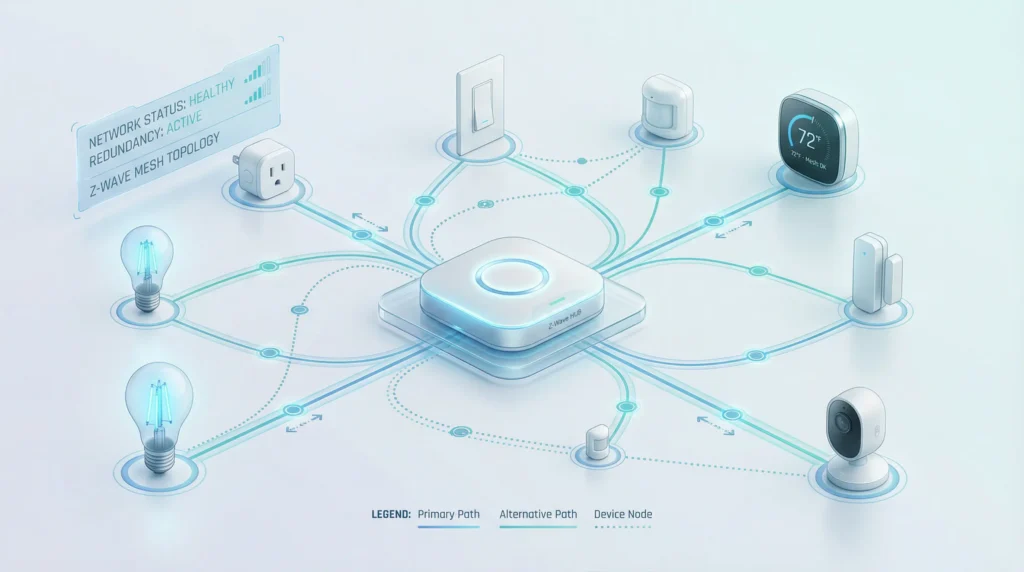
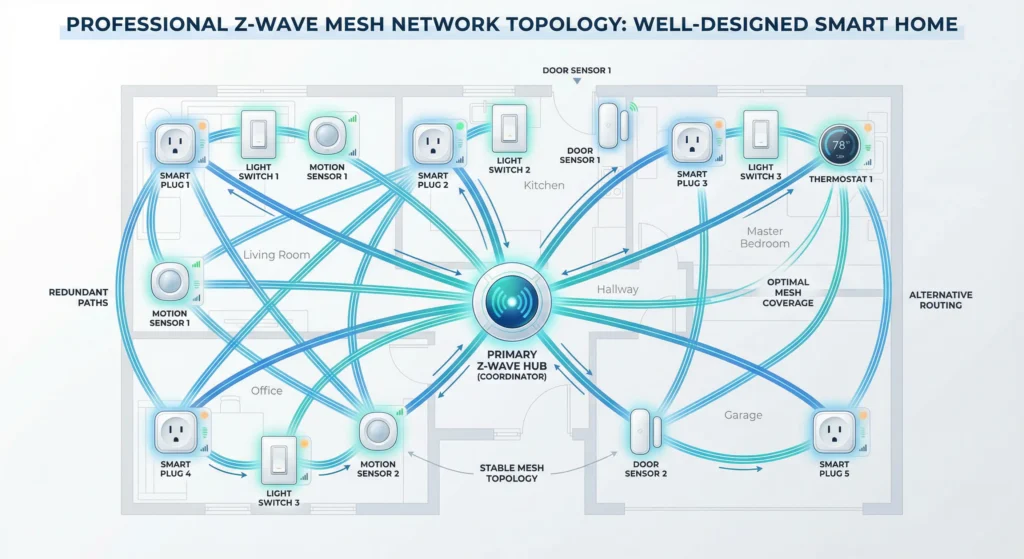
A Z-Wave mesh network is a wireless communication system where every mains-powered device (not battery devices) acts as a signal repeater. When your hub sends a command to a device across the house, the signal does not need to travel directly. Instead, it hops from one device to the next until it reaches its destination.
Think of it like passing a message through a chain of people rather than shouting across a stadium.
How the Routing Table Works
Every Z-Wave controller maintains a routing table. This table maps out which devices can talk to which other devices and what the best path is for each command. When everything works properly, the controller knows the fastest and most reliable route to reach every device.
Why Does Corruption Happen?
The mesh gets corrupted for several common reasons:
- Moving devices to new physical locations without updating the network
- Removing a device physically without properly excluding it from the network
- Power outages that reset devices mid-communication
- Adding new devices that change the optimal routing paths
- Firmware updates on the hub that reset routing information
- Interference from other wireless devices operating on similar frequencies
- Dead devices that the network still tries to route through
When any of these happen, the routing table becomes outdated. The controller tries to send signals through paths that no longer exist or are no longer optimal, which causes delays, failures, and unpredictable behavior.
Signs Your Z-Wave Mesh Is Corrupted
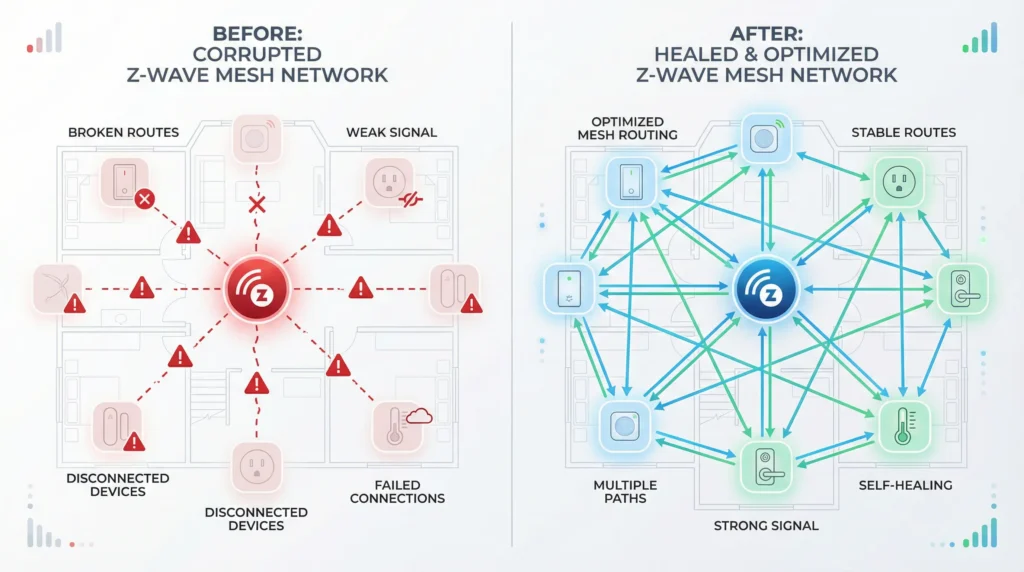
Before jumping into the fix, let us make sure your problem is actually a corrupted mesh and not something else. Here are the telltale signs:
Definite Signs of Mesh Corruption
| Symptom | What It Means |
|---|---|
| Devices respond intermittently | Routes are partially broken |
| Long delays before devices respond | Signals are taking inefficient paths |
| Devices show as “dead” or “unavailable” but still have power | Controller lost the route to them |
| Commands reach the wrong devices | Routing table has conflicting entries |
| Devices that worked fine suddenly stop after moving another device | The moved device was a critical repeater |
| Automations trigger inconsistently | Some commands get lost in transit |
Signs It Might Be Something Else
- If only ONE device fails, it might be a device hardware issue
- If ALL devices fail simultaneously, check your hub or controller
- If devices work manually but not through automations, the issue is likely software configuration
Before You Start: Important Precautions
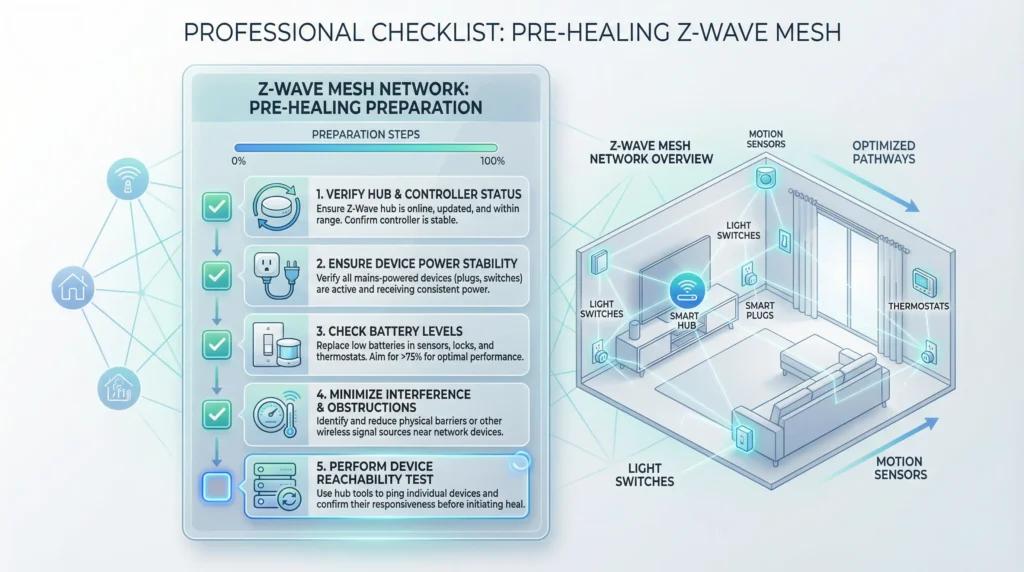
Rebuilding your mesh is a safe process, but there are a few things you should do before starting:
1. Back Up Your Configuration
No matter what platform you use, always create a backup before making network changes. This includes:
- Hub configuration backup
- Automation rules backup
- Device naming and room assignments
- Any custom parameters you have set on devices
2. Make Sure All Mains-Powered Devices Are On
Since mains-powered devices are your repeaters, they need to be powered on during the healing process. Walk through your home and verify that every Z-Wave switch, plug, and relay has power.
3. Wake Up Battery Devices
Battery-powered devices like sensors, door locks, and remote controls sleep most of the time to conserve energy. They will not participate in the heal process until they wake up. You may need to manually trigger them (open/close a sensor, press a button) after the heal completes.
4. Choose the Right Time
The healing process can take anywhere from a few minutes to over an hour depending on how many devices you have. During this time, your smart home may behave erratically. Do this when you do not need your automations running, preferably during daytime when you can see what you are doing without relying on smart lights.
5. Stay Patient
This is the most important one. I have seen people panic halfway through a network heal and start pulling devices out, which only makes things worse. Trust the process.
Step-by-Step Guide to Rebuild Your Z-Wave Mesh Without Re-Pairing
Here is the exact process I follow every time I need to rebuild a Z-Wave mesh. This process works regardless of your platform, though the specific menu options differ.
Step 1: Identify and Remove Ghost Nodes
Ghost nodes are the number one cause of mesh corruption. A ghost node appears when a device is physically removed or dies without being properly excluded from the network. The controller still thinks the device exists and wastes time trying to route through it.
How to find ghost nodes:
- Open your Z-Wave controller’s device list
- Look for devices with no manufacturer information
- Look for devices marked as “unknown” or “not responding”
- Check for duplicate entries of the same device
- Look for nodes with very high node IDs that you do not recognize
How to remove ghost nodes:
- Try the “Remove Failed Node” function in your controller
- If that does not work, try “Replace Failed Node” then cancel the replacement
- On some platforms, you may need to use the Z-Wave JS UI or a similar advanced tool
- As a last resort, use a secondary controller like a Z-Wave stick to force-remove the node
Important: Never use the “Exclude” function on a ghost node. Since the device does not physically exist, exclusion will just time out. Use the “Remove Failed Node” function instead.
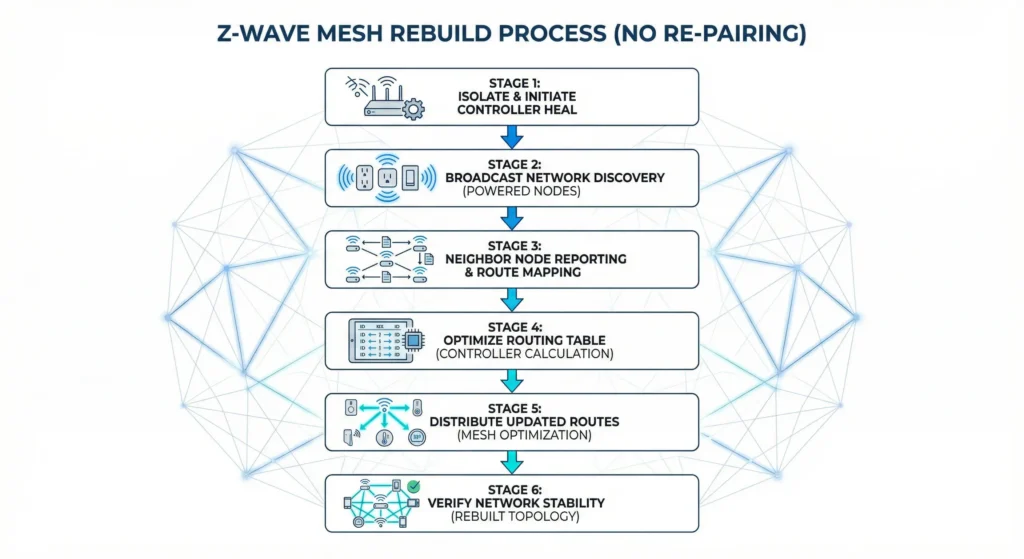
Step 2: Perform a Network-Wide Heal
Once ghost nodes are cleared, it is time to tell your controller to rediscover the optimal routes to every device.
What the heal process does:
- The controller contacts each device one by one
- It asks each device to report its neighbors (other devices it can directly communicate with)
- It rebuilds the routing table based on current device positions and signal strength
- It assigns new optimal routes for every communication path
How to trigger a network heal:
- This varies by platform (detailed in the next section)
- The general location is usually under Z-Wave settings or network management
- Look for options labeled “Heal Network,” “Repair Network,” or “Rebuild Routes”
Step 3: Wait for the Heal to Complete
This is where patience comes in. Here is what to expect based on network size:
| Number of Devices | Estimated Heal Time |
|---|---|
| 1 to 15 devices | 5 to 15 minutes |
| 16 to 40 devices | 15 to 45 minutes |
| 41 to 80 devices | 45 minutes to 2 hours |
| 80+ devices | 2 to 4 hours |
Do not restart your hub, do not send commands to devices, and do not start a second heal while the first one is running.
Step 4: Wake Up Battery-Powered Devices
After the network heal finishes, your mains-powered devices should already have updated routes. But battery devices missed the memo because they were asleep.
For each battery device:
- Physically interact with it (press a button, trigger the sensor, open the lock)
- Some devices have a manual wake-up button (usually a small pinhole button)
- Check your controller to see if the device has reported in
- You may need to wait for the device’s next scheduled wake-up interval
Step 5: Test Every Device
Now verify that things are working:
- Send an on/off command to every switch and plug
- Check that sensors are reporting values
- Test your door locks
- Run your automations manually
- Check response times (they should be under 2 seconds for most devices)
Step 6: Perform a Second Heal (If Needed)
In many cases, especially with larger networks, a single heal does not fully optimize the mesh. The first heal establishes basic routes, and a second heal refines them.
Wait at least 30 minutes after the first heal completes, then run it again. I have found that running two heals back-to-back produces the best results.
How to Heal Your Z-Wave Network on Different Platforms
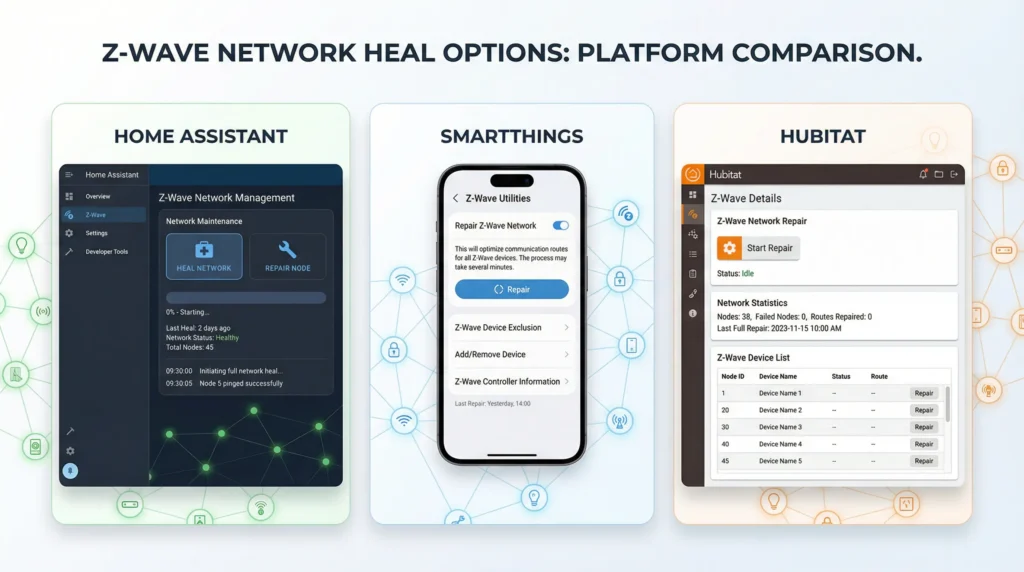
Home Assistant (Z-Wave JS)
Home Assistant with the Z-Wave JS integration has one of the most powerful Z-Wave management interfaces available.
To heal the entire network:
- Go to Settings then Devices & Services
- Click on Z-Wave JS
- Click Configure
- Select Heal Network from the available options
- Monitor progress in the Z-Wave JS logs
To heal a single problematic device:
- Navigate to the device page in Z-Wave JS
- Click on the node
- Select Heal Node
- Wait for completion
To remove ghost nodes:
- Open the Z-Wave JS UI (accessible through the add-on or integration)
- Find the problematic node
- Click Remove Failed Node
- If it fails, try refreshing the node info first, then retry
For more details, check the official Home Assistant Z-Wave documentation: Home Assistant Z-Wave JS Documentation
SmartThings
To repair the Z-Wave network:
- Open the SmartThings app
- Go to the Hub device
- Tap the three-dot menu
- Select Z-Wave Utilities
- Tap Repair Z-Wave Network
- Wait for the process to complete (you will get a notification)
SmartThings runs the repair in the background. You can close the app and it will continue. Detailed instructions are available on the Samsung support page: SmartThings Z-Wave Troubleshooting
Hubitat Elevation
To repair the mesh:
- Go to Settings in your Hubitat dashboard
- Click on Z-Wave Details
- Review all devices for any showing as “PENDING” or with no route
- Click Repair Z-Wave to start a network-wide heal
- Check the logs under Logs then Z-Wave Logs for progress
To deal with ghost nodes in Hubitat:
- In Z-Wave Details, look for nodes with a “Discover” button but no device info
- Click Refresh on the ghost node
- Once it shows as failed, click Remove
- If it will not remove, you may need to shut down the hub, pull the power for 30 seconds, power back on, and try again
Hubitat has excellent community resources: Hubitat Community Forum
Vera / ezlo
To heal the Z-Wave network:
- Log in to your Vera dashboard
- Go to Devices then Z-Wave Settings
- Click Repair or Heal Network
- Monitor progress in the dashboard
Aeotec Smart Home Hub (formerly Samsung)
The process is similar to SmartThings since it runs on the same platform. Use the SmartThings app and follow the SmartThings instructions above.
Advanced Troubleshooting: When Basic Healing Doesn’t Work
Sometimes a standard network heal is not enough. Here are advanced techniques for stubborn mesh issues.
Technique 1: Individual Node Healing
Instead of healing the entire network, target specific problem devices:
- Identify which devices are not responding correctly
- Heal only those nodes one at a time
- Wait for each to complete before moving to the next
- Test each device after its individual heal
This is especially effective when only a few devices are problematic while the rest of the network works fine.
Technique 2: The Power Cycle Method
This technique forces devices to re-establish their neighbor lists:
- Turn off all Z-Wave devices at the breaker (not through software)
- Wait 30 seconds
- Turn devices back on starting with the ones closest to the hub
- Wait 5 minutes between turning on each “ring” of devices
- Once all devices are powered on, run a network heal
This method works because devices automatically try to find neighbors when they first power up. By turning them on in order from nearest to farthest from the hub, you build the mesh layer by layer.
Technique 3: Using a Z-Wave Stick as a Secondary Controller
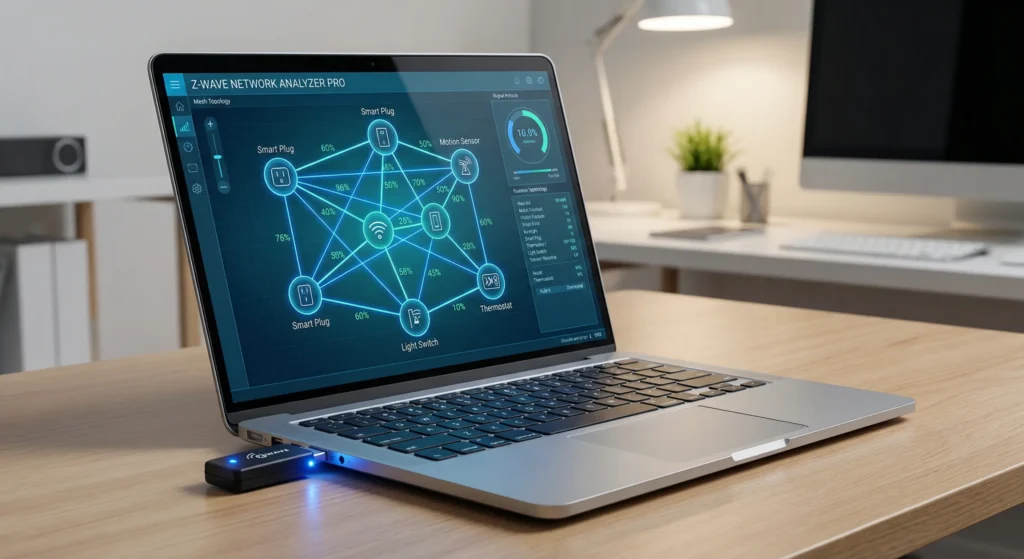
If your primary controller is struggling with ghost nodes or corrupted routes, a USB Z-Wave stick like the Zooz ZST39 or Aeotec Z-Stick 7 can help:
- Add the stick as a secondary controller to your network
- Use software like Z-Wave JS UI or Silicon Labs PC Controller
- Access the low-level network management functions
- Remove ghost nodes that your primary controller cannot remove
- Force route updates on stubborn devices
You can find the Silicon Labs PC Controller software here: Silicon Labs Z-Wave PC Controller
Technique 4: NIF (Node Information Frame) Request
Some devices get stuck in a state where they are not properly advertising their capabilities:
- Use your controller’s advanced interface to send a NIF request to the problematic device
- The device will re-broadcast its capabilities and supported command classes
- The controller updates its records for that device
- Run a heal on that specific node afterward
Technique 5: Check for Frequency Conflicts
Z-Wave operates on different frequencies depending on your region:
| Region | Frequency |
|---|---|
| US / Canada | 908.42 MHz |
| Europe | 868.42 MHz |
| Australia / New Zealand | 921.42 MHz |
| Japan | 922 to 926 MHz |
If you have devices from different regions, they cannot communicate with each other and will create dead spots in your mesh. Verify that all your devices match your controller’s frequency.
Real-World Scenarios and How They Were Fixed
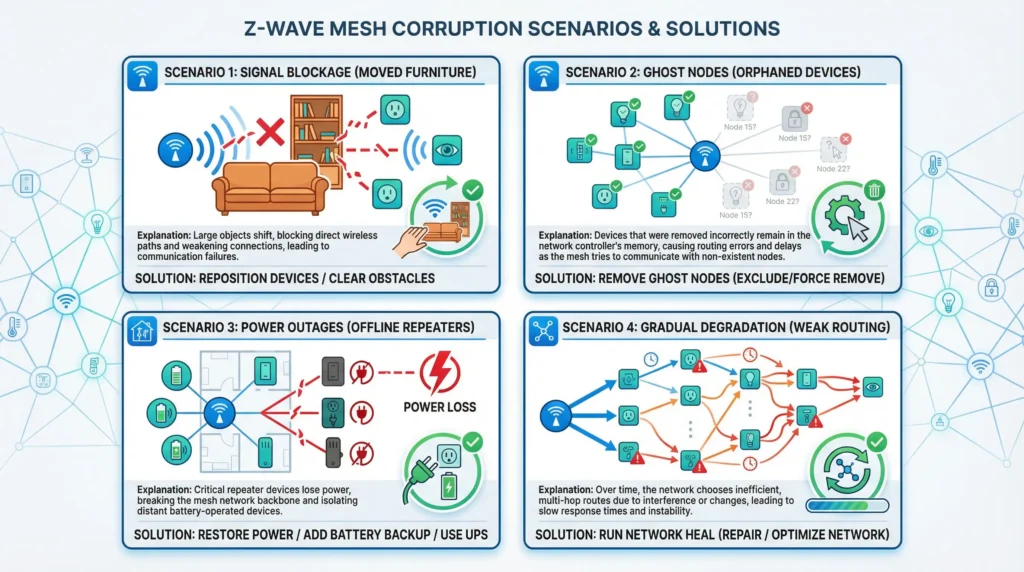
Scenario 1: The Moved Furniture Problem
The situation: Sarah had a Z-Wave setup with 25 devices in her home. Everything worked perfectly for months. Then she rearranged her living room furniture, moving a large bookshelf in front of a smart plug that was acting as a key repeater. Suddenly, 8 devices in the back of the house became unreachable.
The fix: She did not need to re-pair anything. She simply moved the smart plug to a new location where it was not blocked by the bookshelf, then ran a network heal. Within 20 minutes, all 8 devices were back online. The heal process found new routes that used the plug in its new position.
The lesson: Physical changes in your home can block Z-Wave signals. Always run a heal after moving furniture or devices.
Scenario 2: The Ghost Node Nightmare
The situation: Mike replaced a faulty Aeotec smart switch but forgot to exclude it before physically removing it. His Hubitat hub still had the old device as a node. Over the next few weeks, more and more devices became slow or unresponsive. The hub was trying to route signals through a device that no longer existed.
The fix: Mike opened Hubitat’s Z-Wave Details page and found the ghost node. It showed a device with no manufacturer info and no route. He clicked “Refresh” several times until the hub marked it as failed, then clicked “Remove.” After removing the ghost node and running a network heal twice, his entire mesh recovered.
The lesson: Always properly exclude a device before physically removing it. If you forget, find and remove the ghost node as soon as possible.
Scenario 3: The Post-Power-Outage Chaos
The situation: After a 6-hour power outage, David’s entire Z-Wave network with 60+ devices was in chaos. Lights responded randomly, sensors reported wrong values, and his smart locks were completely unresponsive.
The fix: David waited 15 minutes after power was fully restored to let all devices boot up. Then he ran a network-wide heal from his Home Assistant instance. The first heal fixed about 70% of the issues. He waited an hour and ran a second heal, which brought the network back to about 95%. For the remaining battery-powered door locks and sensors, he manually woke each one up by pressing their buttons. Within 3 hours, everything was back to normal.
The lesson: After a power outage, give all devices time to power up fully before running a heal. Plan for two heal cycles for larger networks.
Scenario 4: The Slowly Degrading Network
The situation: Lisa noticed her Z-Wave network getting progressively slower over 6 months. Response times went from instant to 3 to 5 seconds. No specific event triggered it.
The fix: Lisa discovered she had never run a network heal since setting up her system a year ago. During that year, she had added 15 new devices. The routing table still reflected the original layout with only the first 20 devices. Running a heal allowed the controller to discover all the new repeating devices and build much more efficient routes. Response times dropped back to under 1 second.
The lesson: Run a network heal periodically, especially after adding new devices. A quarterly heal is a good practice.
How to Prevent Z-Wave Mesh Corruption in the Future
Prevention is always easier than repair. Here are proven strategies to keep your mesh healthy.
1. Always Exclude Before Removing
Make it a strict rule: never physically remove a Z-Wave device without excluding it from the network first. This prevents ghost nodes, which are the most common cause of mesh corruption.
2. Run Scheduled Heals
Set a reminder to run a network heal:
- After adding or removing any device
- After moving any device to a new location
- After a power outage
- Once every 3 months as routine maintenance
- After any hub firmware update
3. Build Redundant Paths
A mesh network is only as strong as its weakest link. Make sure you have enough repeating devices (mains-powered Z-Wave devices) to create multiple paths to every area of your home.
Rule of thumb: You should have at least one mains-powered Z-Wave device every 20 to 30 feet (6 to 9 meters) throughout your home. If there is an area with only one possible path, add a Z-Wave smart plug or repeater.
4. Keep Battery Devices Updated
Battery-powered devices with critically low batteries can cause communication errors that affect the mesh. Replace batteries proactively when levels drop below 20%.
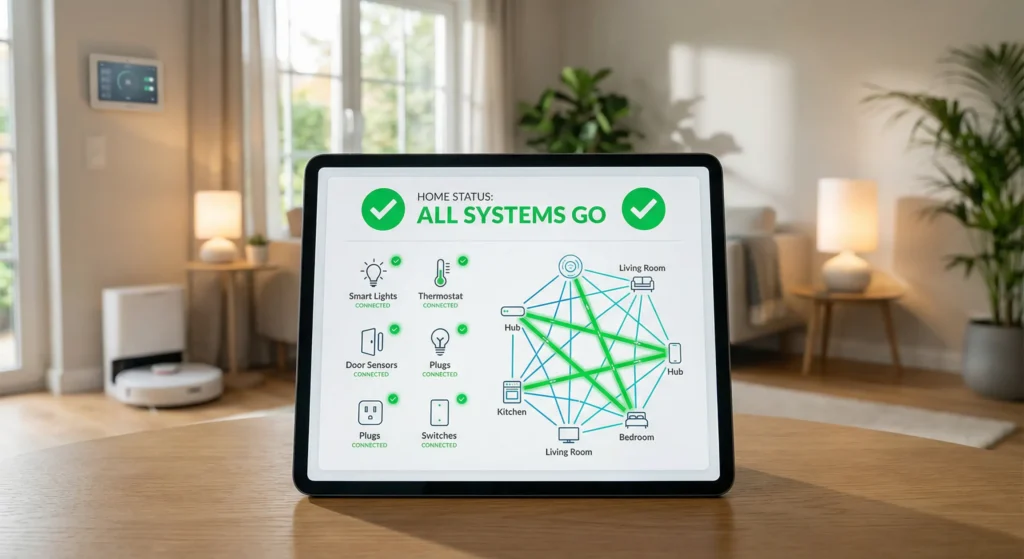
5. Monitor Your Network Health
Use your platform’s Z-Wave network map or topology view to regularly check:
- Are all devices showing as reachable?
- Are there any nodes with no neighbors?
- Are response times consistent?
- Are there any error patterns in the logs?
6. Maintain a Device Inventory
Keep a spreadsheet or document listing:
- Device name and model
- Node ID
- Physical location
- Date added to the network
- Last known good status
This makes troubleshooting much faster when issues arise.
Frequently Asked Questions
Will healing my Z-Wave network erase my device settings?
No. A network heal only updates the routing table. All your device configurations, names, automations, and custom parameters remain unchanged. Your devices keep their node IDs and all associated settings.
How often should I heal my Z-Wave network?
For most homes, healing every 3 months is sufficient. However, you should also heal after any physical changes (adding, removing, or moving devices), after power outages, and after hub firmware updates.
Can I use my smart home while a heal is running?
Technically yes, but I do not recommend it. Sending commands during a heal can interfere with the process and produce suboptimal results. Wait until the heal completes before resuming normal use.
What is the difference between “heal” and “repair” in Z-Wave?
They are essentially the same thing. Different platforms use different terminology. SmartThings calls it “Repair,” Home Assistant calls it “Heal,” and some controllers call it “Optimize.” They all do the same thing: rebuild the routing table.
Do battery-powered devices need special attention during a heal?
Yes. Battery devices are in sleep mode most of the time and will miss the heal process. After the network heal completes, you need to manually wake each battery device so it can receive its updated routing information. This usually means pressing a button on the device or triggering its sensor.
Will a Z-Wave heal fix a device that needs re-pairing?
Not always. If a device has been factory reset (either intentionally or due to a fault), it will need to be excluded and re-paired. The heal process only works for devices that are still properly paired but have routing issues.
Can I heal just one device instead of the entire network?
Yes. Most modern Z-Wave platforms allow you to heal individual nodes. This is faster and less disruptive than a full network heal. It is the best approach when only one or two specific devices are having issues.
Is Z-Wave Long Range (Z-Wave LR) affected by mesh corruption?
Z-Wave LR operates differently from classic Z-Wave. LR devices communicate directly with the hub rather than through a mesh, so they are not affected by mesh routing issues. However, if you have a mix of classic and LR devices, your classic devices can still experience mesh corruption.
My device shows a route through a device I removed. What do I do?
This is a classic ghost node situation. Find the removed device in your Z-Wave device list, mark it as failed, and remove it. Then run a network heal to update all routes that previously went through that device.
Can too many devices cause mesh corruption?
Z-Wave supports up to 232 devices per network, but having too many devices in a small area can cause congestion. This is not exactly corruption, but it can cause similar symptoms like slow responses and missed commands. If you have more than 100 devices, consider optimizing your network with strategically placed repeaters.
Final Thoughts
Rebuilding a corrupted Z-Wave mesh without re-pairing devices is not only possible, it is actually the recommended approach. Re-pairing should always be your absolute last resort, not your first reaction.
The key takeaways from this guide are simple. Remove ghost nodes first because they are the root cause of most mesh problems. Run a proper network heal and give it time to complete. Wake up your battery devices after the heal finishes. And most importantly, be patient with the process.
I have rebuilt dozens of Z-Wave networks over the years, some with over 100 devices, and I have only needed to re-pair individual devices maybe two or three times total. The healing process works. It just needs you to follow the steps correctly and give it the time it requires.
Your smart home is an investment. Treat your Z-Wave network like any other important system in your house. Give it regular maintenance, keep an eye on its health, and address issues early before they cascade into bigger problems.
If you follow the steps in this guide, your Z-Wave mesh will be running smoothly in no time, and you will not have lost a single device pairing in the process.
Useful External Resources
- Z-Wave Alliance Official Website for device compatibility and standards
- Home Assistant Z-Wave JS Documentation for Home Assistant users
- Hubitat Community Forum for Hubitat-specific troubleshooting
- Z-Wave JS UI GitHub Repository for advanced network management tools
- Silicon Labs Z-Wave Documentation for technical protocol information