

Table of Contents
- Introduction: When Your Smart Home Suddenly Goes Silent
- What Causes Home Assistant Database Corruption?
- Signs Your Home Assistant Database Is Corrupted
- Step-by-Step: How to Recover a Corrupted Home Assistant Database
- How to Fix Automations Broken by Database Corruption
- How to Prevent Future Database Corruption
- Real-World Recovery Scenarios
- Tools and Resources for Database Repair
- Frequently Asked Questions (FAQ)
- Final Thoughts
Introduction: When Your Smart Home Suddenly Goes Silent
You wake up one morning, and something feels off. The lights did not turn on automatically. The thermostat did not adjust. Your morning coffee routine, the one you spent weeks perfecting in Home Assistant, simply did not run.
You open Home Assistant, and there it is. Error messages everywhere. The recorder component is throwing warnings. Your automations are either stuck or completely unresponsive. You check the logs, and the dreaded words stare back at you: database is malformed or disk I/O error.
I have been there. Twice, actually. And both times, the panic was real. Years of history data, carefully crafted automations, and energy tracking, all seemingly gone in an instant.
But here is the good news. In most cases, your automations themselves are safe. The database corruption typically affects the recorder data and state history, not your actual automation YAML or UI configurations. And even when things look terrible, there are proven ways to get everything back on track.
In this guide, I will walk you through exactly how to diagnose and recover corrupted Home Assistant database, with a focus on getting your automations running again as quickly as possible. Every step here comes from real experience and community-tested solutions.
Let us get your smart home back to life.
What Causes Home Assistant Database Corruption?
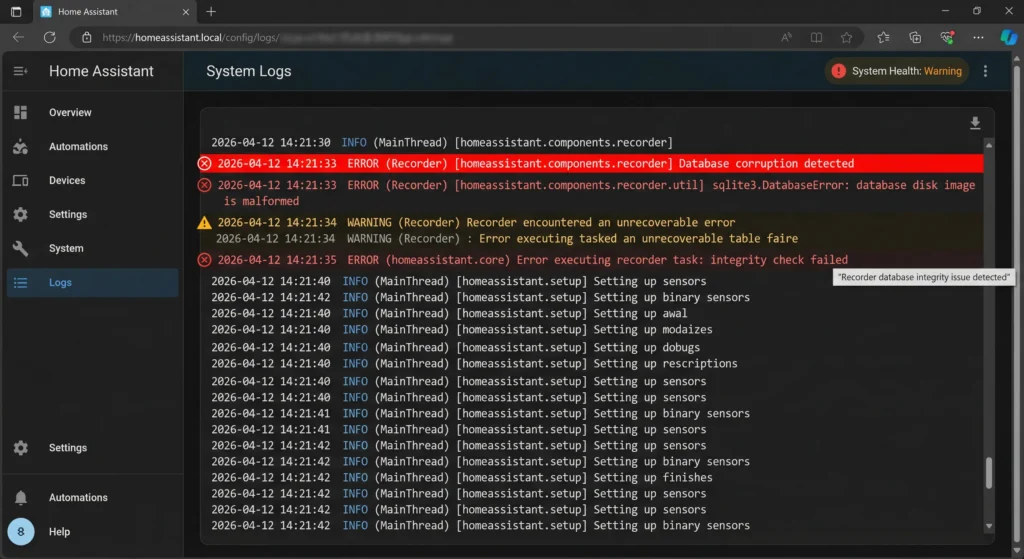
Before we fix the problem, understanding why it happens will help you prevent it from coming back. Home Assistant uses SQLite as its default database engine through the Recorder integration. SQLite is lightweight and efficient, but it has some vulnerabilities.
Power Outages and Sudden Shutdowns
This is the number one cause. When Home Assistant is writing data to the database and the power cuts out, the write operation gets interrupted mid-transaction. SQLite relies on journaling to maintain data integrity, and a sudden loss of power can corrupt the journal file alongside the main database.
SD Card Degradation (Raspberry Pi Users)
If you are running Home Assistant on a Raspberry Pi with an SD card, this is almost inevitable over time. SD cards have a limited number of write cycles. The recorder component writes data constantly, and after months or years, sectors on the SD card begin to fail. This leads to silent corruption that builds up until the database becomes unreadable.
Disk Space Running Out
When your storage fills up completely, SQLite cannot complete its transactions properly. This leaves the database in a partially written state, which is essentially corruption.
Improper Backups or File System Errors
Copying the database file while Home Assistant is actively writing to it can create an inconsistent copy. Similarly, file system errors on your host operating system can introduce corruption over time.
Large Database Files
Databases that grow beyond 1 to 5 GB become increasingly fragile. The larger the file, the more likely that a minor issue escalates into a major corruption event.
Signs Your Home Assistant Database Is Corrupted
Recognizing corruption early can save you a lot of headaches. Here are the symptoms I have personally encountered and those widely reported by the community.
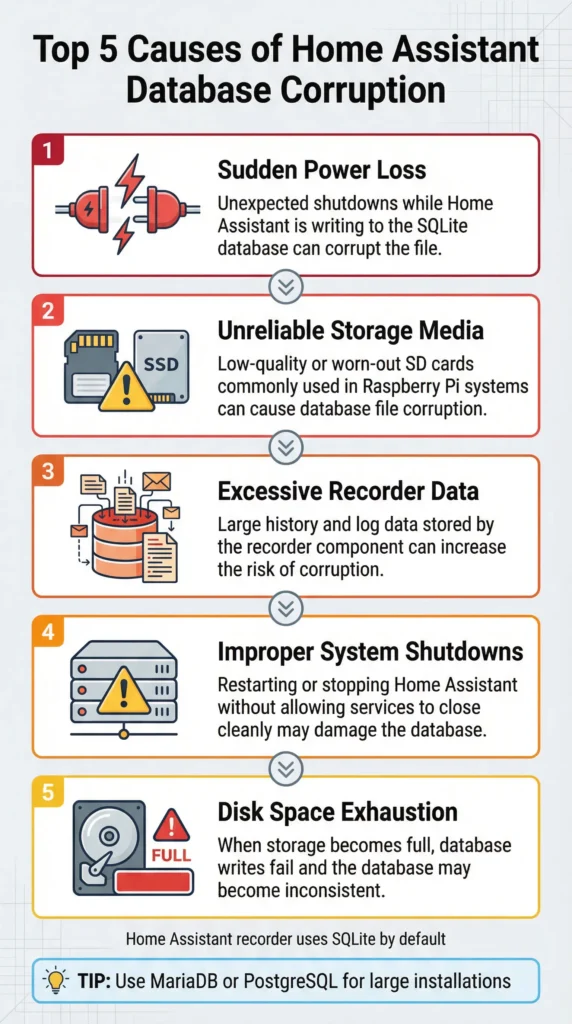
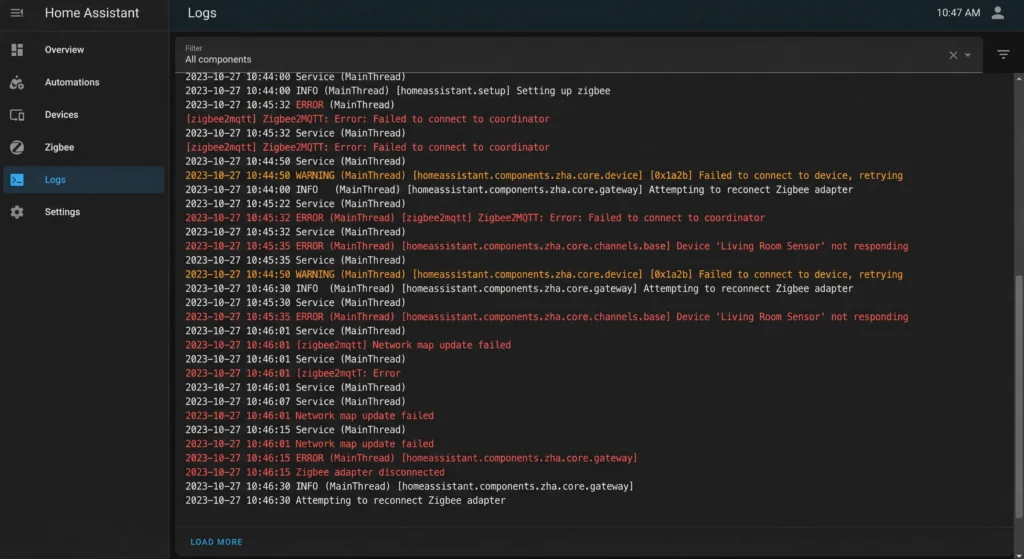
Error Messages in the Logs
Open your Home Assistant logs (Settings > System > Logs) and look for messages like:
sqlite3.DatabaseError: database disk image is malformedError during connection setup: disk I/O errorThe recorder could not start, check the logOperationalError: database is locked
Automations Stop Firing
This is often the most visible symptom. Your automations rely on state changes tracked by the recorder. When the database is corrupted, the state machine can behave unpredictably. Automations may stop triggering because Home Assistant cannot properly read or write entity states.
History and Logbook Are Empty or Broken
If you navigate to the History or Logbook panels and see blank pages, missing data, or error messages, the recorder database is almost certainly compromised.
Home Assistant Takes Forever to Start
A corrupted database forces Home Assistant to spend excessive time trying to read and validate data during startup. Boot times that normally take 1 to 2 minutes can stretch to 10 minutes or more, sometimes resulting in a complete failure to start.
Entity States Showing “Unavailable” or “Unknown”
When entities that should be working fine show up as unavailable or unknown after a restart, it can indicate that their last known states were stored in a corrupted section of the database.
Increased CPU and Memory Usage
SQLite trying to work around corrupted pages leads to abnormally high resource usage, which can slow down your entire system.
Step-by-Step: How to Recover a Corrupted Home Assistant Database
Now for the part you came here for. Follow these steps carefully, and you will have a working system again.
Step 1: Stop Home Assistant
Before touching anything, stop Home Assistant to prevent further damage to the database.
For Home Assistant OS (HAOS):
Access the terminal via the SSH add-on or the Terminal add-on and run:
Bashha core stop
For Home Assistant Container (Docker):
Bashdocker stop homeassistant
For Home Assistant Supervised or Core:
Bashsudo systemctl stop home-assistant@homeassistant
Step 2: Create a Backup of the Current Database
Even though the database is corrupted, always make a copy before attempting any fixes. You never want to make things worse.
Bashcp /config/home-assistant_v2.db /config/home-assistant_v2.db.corrupt.backup
This gives you a safety net. If your recovery attempt fails, you still have the original file to try alternative methods.
Step 3: Attempt Database Repair Using SQLite
SQLite includes built-in integrity checking and recovery tools. Here is how to use them.
First, install SQLite if it is not already available:
Bashapk add sqlite
or
Bashapt-get install sqlite3
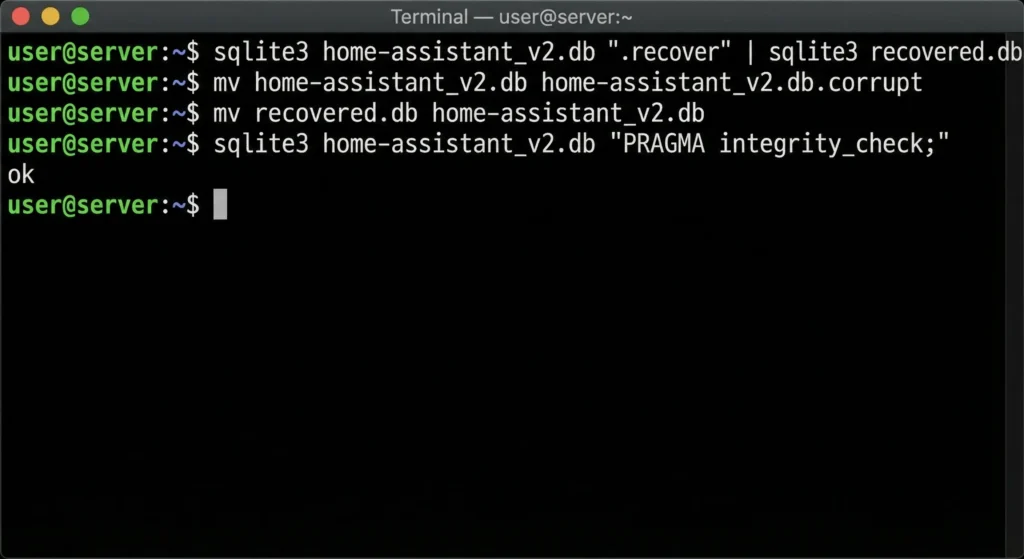
Run an integrity check:
Bashsqlite3 /config/home-assistant_v2.db "PRAGMA integrity_check;"
If the output says anything other than “ok,” the database is confirmed corrupt.
Attempt to recover data into a new database:
Bashsqlite3 /config/home-assistant_v2.db ".recover" | sqlite3 /config/home-assistant_v2_recovered.db
This command tells SQLite to extract whatever data it can from the corrupted file and write it into a fresh, clean database.
If the .recover command is not available (older SQLite versions), use this alternative:
Bashsqlite3 /config/home-assistant_v2.db ".dump" | sqlite3 /config/home-assistant_v2_recovered.db
Step 4: Replace the Corrupted Database
If the recovery produced a valid new file, replace the old one:
Bashmv /config/home-assistant_v2.db /config/home-assistant_v2.db.old
mv /config/home-assistant_v2_recovered.db /config/home-assistant_v2.db
Step 5: If Recovery Fails, Start Fresh
Sometimes the corruption is too severe to recover any data. In that case, the cleanest solution is to delete the database entirely and let Home Assistant create a new one:
Bashrm /config/home-assistant_v2.db
rm /config/home-assistant_v2.db-shm   # if exists
rm /config/home-assistant_v2.db-wal   # if exists
You will lose your history and logbook data, but your automations, integrations, and configurations will remain intact.
Step 6: Restart Home Assistant
Bashha core start
or
Bashdocker start homeassistant
Home Assistant will detect the missing database and create a fresh one automatically.
How to Fix Automations Broken by Database Corruption
Getting the database fixed is only half the battle. Your automations may still need attention. Here is how to get them firing again.
Check If Automations Still Exist
First, verify that your automation configurations are intact. Go to Settings > Automations and Scenes. If your automations are listed there, their configuration survived, because automations are stored in /config/automations.yaml or in .storage/core.config_entries, not in the SQLite database.
Reload All Automations
Sometimes automations just need a fresh reload after database recovery:
- Go to Developer Tools
- Click on the YAML tab
- Click Reload Automations
Alternatively, call the service from Developer Tools:
YAMLservice: automation.reload
Re-enable Disabled Automations
Database corruption can sometimes cause automations to become disabled. Check each automation and re-enable any that were turned off:
- Go to Settings > Automations and Scenes
- Look for any automations with a toggle in the “off” position
- Toggle them back on
Fix Entity ID Mismatches
After a database reset, some entities may have gotten new entity IDs (especially if integrations were re-added). If your automations reference entities by ID, you may need to update them:
- Go to Settings > Devices and Services > Entities
- Find any entities with “_2” appended to their names
- Either rename them back to the original ID or update your automations to use the new IDs
Test Each Automation Manually
Do not just assume everything works. Go through your critical automations and trigger them manually:
- Open the automation
- Click the three-dot menu
- Select Run Actions (formerly “Trigger”)
- Verify the expected result
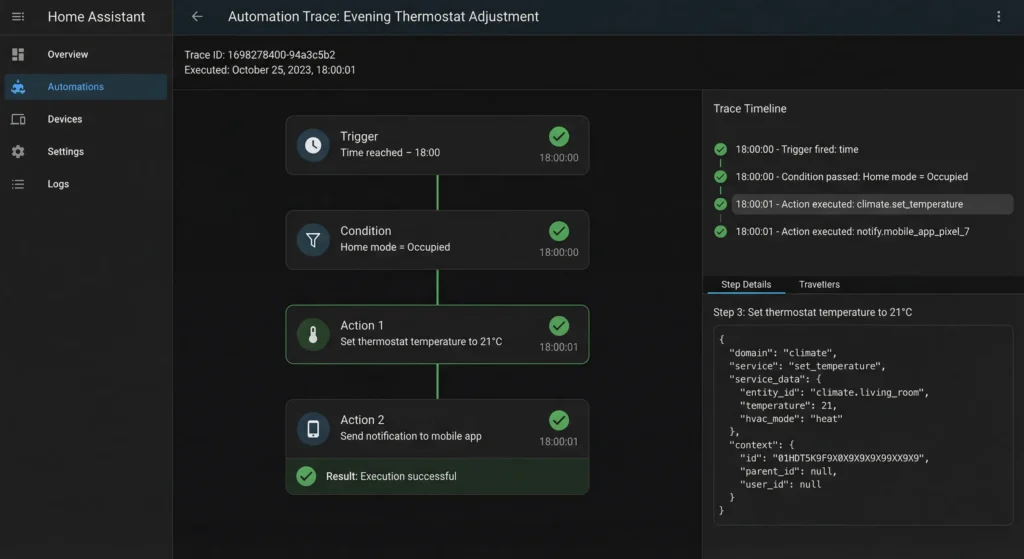
Review the Automation Trace
After triggering an automation, check its trace to see if it executed correctly:
- Open the automation
- Click Traces
- Review the execution path for any errors
How to Prevent Future Database Corruption
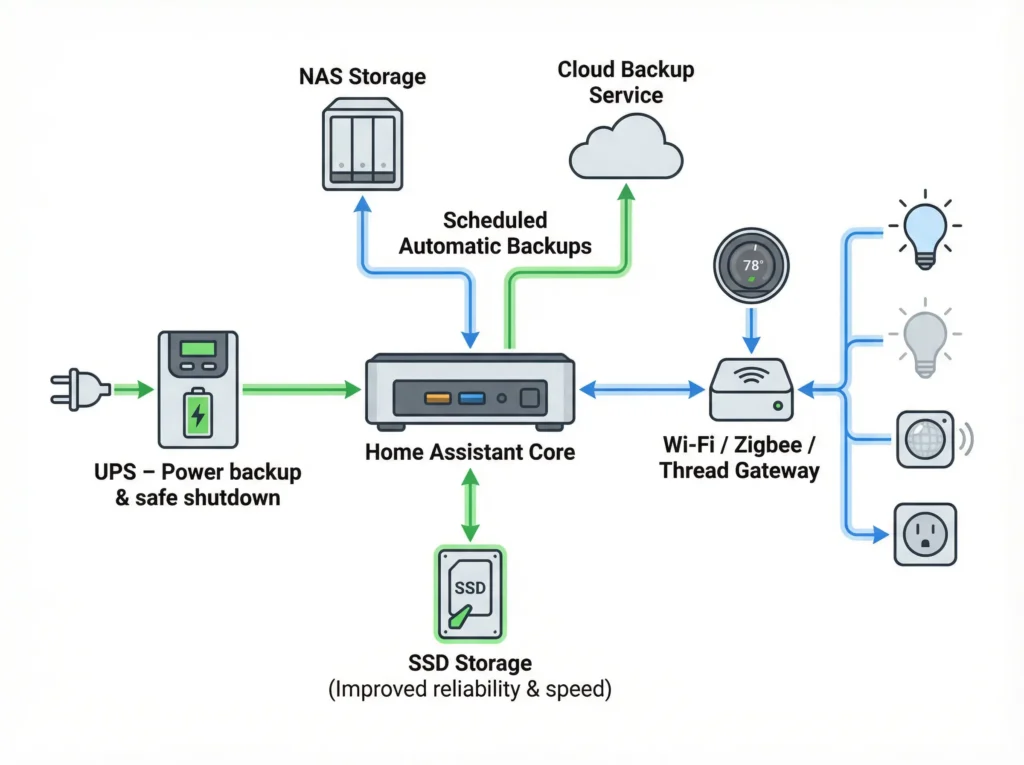
Recovery is great, but prevention is better. Here are battle-tested strategies to protect your Home Assistant database.
Move Away From SD Cards
If you are running on a Raspberry Pi, the single best thing you can do is stop using an SD card for your primary storage. Options include:
- USB SSD drive: Boot from a USB-connected SSD. This is affordable and dramatically more reliable
- Network-attached storage: Store your database on a NAS
- Migrate to a mini PC: Intel NUC or similar devices offer proper SSD storage
Limit What the Recorder Stores
By default, the recorder tracks every entity state change. You can significantly reduce database writes by configuring what gets recorded:
YAMLrecorder:
  purge_keep_days: 7
  commit_interval: 5
  exclude:
    domains:
      - media_player
      - weather
      - camera
    entity_globs:
      - sensor.sun_*
    entities:
      - sensor.date
      - sensor.time
This reduces the write load on your storage and keeps the database file small.
Set Up Automated Backups
Configure regular backups so you always have a recent clean copy:
- Install the Google Drive Backup add-on or use the built-in backup system
- Schedule daily backups
- Keep at least 7 days of backup history
- Periodically verify that backups can be restored
Use MariaDB Instead of SQLite
For users who want a more robust database, switching to MariaDB provides better crash recovery, write-ahead logging, and concurrent access handling:
- Install the MariaDB add-on from the add-on store
- Configure the recorder to use MariaDB:
YAMLrecorder:
  db_url: mysql://homeassistant:password@core-mariadb/homeassistant?charset=utf8mb4
This is one of the most impactful changes you can make for long-term reliability.
Use a UPS (Uninterruptible Power Supply)
A small UPS can keep your Home Assistant device running during brief power outages, giving the database time to complete transactions. For Raspberry Pi setups, even a battery HAT can provide this protection.
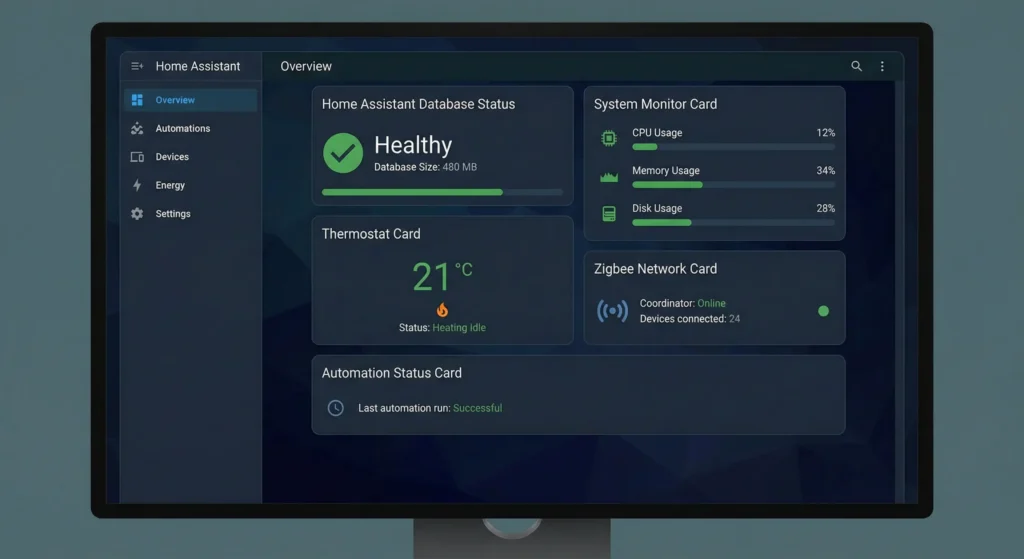
Monitor Database Health
Set up a sensor to track the database file size and alert you if it grows too large:
YAMLsensor:
  - platform: filesize
    file_paths:
      - /config/home-assistant_v2.db
Create an automation to notify you when the database exceeds a threshold:
YAMLautomation:
  - alias: "Alert: Database size warning"
    trigger:
      - platform: numeric_state
        entity_id: sensor.home_assistant_v2_db
        above: 2000
    action:
      - service: notify.mobile_app
        data:
          message: "Home Assistant database is over 2GB. Consider purging old data."
Real-World Recovery Scenarios
These are actual scenarios from real users and my own experience to give you context for your situation.
Scenario 1: The Midnight Power Outage
What happened: A user on a Raspberry Pi 4 experienced a power outage at 2 AM. When power returned, Home Assistant started but with a completely non-functional recorder. All automations had stopped, and the logbook showed nothing.
The fix: They stopped HA, ran the SQLite .recover command, and got about 90% of their history data back. All automations resumed immediately after restart. They then invested $25 in a USB SSD and migrated their installation, which solved the root cause permanently.
Time to resolve: About 45 minutes.
Scenario 2: The Overflowing Database
What happened: A user never configured recorder exclusions. After 18 months, their database had grown to 8 GB on a system with 16 GB of storage. When the disk filled up, the database corrupted, and Home Assistant would not even start.
The fix: They accessed the system via SSH, deleted the database file entirely, and added recorder exclusions to their configuration. They lost all history but gained a system that was faster than it had been in months. All automations came back perfectly after a restart.
Time to resolve: About 20 minutes.
Scenario 3: The Gradual Degradation
What happened: I noticed my automations were becoming unreliable over a period of about two weeks. Some would fire late, others would miss triggers entirely. The logs showed occasional SQLite warnings, but nothing dramatic. Eventually, Home Assistant failed to start completely.
The fix: The SQLite .dump command partially worked but produced a database with missing tables. I ended up restoring from a 3-day-old backup (thank goodness for automated backups) and only lost 3 days of history. I then migrated to MariaDB to prevent recurrence.
Time to resolve: About 1 hour, mostly waiting for the backup to restore.
Tools and Resources for Database Repair
Here are the most useful tools and resources for dealing with Home Assistant database issues.
SQLite Browser
DB Browser for SQLite is a free, open-source tool that lets you visually inspect and edit SQLite databases. You can download the corrupted database to your PC and examine it with a graphical interface.
Home Assistant Community Forum
The Home Assistant Community Forum has extensive threads on database recovery. Search for “database corrupted” or “database malformed” to find solutions specific to your error messages.
Home Assistant Documentation
The official Recorder Integration documentation provides detailed information about database configuration, exclusions, and alternative database engines.
SQLite Official Documentation
The SQLite Recovery documentation explains the .recover command and other recovery mechanisms in detail.
GitHub Issues
Check the Home Assistant Core GitHub repository for known bugs related to database handling. Some corruption issues have been traced back to specific versions and fixed in updates.
Frequently Asked Questions (FAQ)
Will I lose my automations if I delete the Home Assistant database?
No. Your automations are stored separately in /config/automations.yaml or in the .storage directory. The SQLite database (home-assistant_v2.db) only contains historical state data, event logs, and statistics. Deleting it means you lose history, but your automations, scripts, scenes, and integrations remain untouched.
Can I prevent database corruption completely?
You cannot guarantee 100% prevention, but you can reduce the risk to near zero. Using an SSD instead of an SD card, employing a UPS for power protection, switching to MariaDB, and configuring recorder exclusions will collectively make corruption extremely unlikely.
How long does database recovery take?
It depends on the size of your database and the severity of corruption. For most users, the entire process takes between 20 minutes and 2 hours. Small databases under 1 GB typically recover in under 30 minutes.
Should I switch from SQLite to MariaDB?
If you have experienced corruption more than once, or if your smart home is mission-critical (security systems, health monitoring), switching to MariaDB is strongly recommended. MariaDB handles crash recovery much better than SQLite and is designed for concurrent read/write operations.
Why do my automations stop working after database corruption even though they still exist?
Automations depend on entity states stored in the database. When the database is corrupted, Home Assistant may not be able to read the last known state of triggers and conditions. After recovery or database deletion, a full restart allows Home Assistant to re-establish entity states from the actual devices, which restores automation functionality.
Can I use the Home Assistant backup to restore just the database?
Yes, but it requires manual extraction. Home Assistant backups are tar files. You can extract them, locate the home-assistant_v2.db file inside, and replace only that file. However, be aware that restoring an old database means you lose any state changes or new entities added since that backup was created.
How often should I back up my Home Assistant?
Daily backups are recommended for most users. If you make frequent configuration changes, consider backing up every 12 hours. Always keep at least 5 to 7 days of backup history so you have multiple restore points to choose from.
Is there a way to check my database health automatically?
Yes. You can set up a command-line sensor that runs a periodic integrity check:
YAMLsensor:
  - platform: command_line
    name: Database Integrity
    command: 'sqlite3 /config/home-assistant_v2.db "PRAGMA integrity_check;" 2>&1 | head -1'
    scan_interval: 86400
This checks the database once every 24 hours and reports the result as a sensor value.
Final Thoughts
Dealing with a corrupted Home Assistant database is frustrating, but it is rarely catastrophic. The most important thing to remember is that your automations, configurations, and integrations are almost always safe. The database holds your history, not your smart home logic.
The recovery process follows a clear path: stop Home Assistant, back up the corrupted file, attempt SQLite recovery, and if that fails, start with a fresh database. Your automations will come back to life once entity states are re-established after a clean restart.
But more importantly, take this experience as a wake-up call to put prevention measures in place. Move to an SSD if you are on an SD card. Set up automated backups. Configure recorder exclusions to keep your database lean. Consider MariaDB if reliability is critical. And add a small UPS to protect against power outages.
Your smart home is worth protecting. A little effort now saves a lot of stress later.
If this guide helped you recover your system, consider bookmarking it for future reference. Database corruption tends to happen when you least expect it, and having a tested recovery plan makes all the difference.